Difference between revisions of "Team:Marburg/Hardware"
| Line 108: | Line 108: | ||
</p> | </p> | ||
| + | |||
| + | <div class="popup-content"> | ||
| + | <section class="section"> | ||
| + | <h2 class="subtitle">Cultivation</h2> | ||
| + | <div class="wrap-collabsible" style="margin-bottom: 25px;"> | ||
| + | <input id="collapsible1" class="toggle" type="checkbox"> | ||
| + | <label for="collapsible1" class="lbl-toggle"> | ||
| + | BG11 media | ||
| + | <hr style="width: unset;"> | ||
| + | </label> | ||
| + | <div class="collapsible-content"> | ||
| + | <div class="content-inner"> | ||
| + | <p> | ||
| + | <figure style="text-align: center; margin-left: 25px;"> | ||
| + | <img style="height: 600px; width: 420px" | ||
| + | src="https://static.igem.org/mediawiki/2019/6/62/T--Marburg--mountbelow.JPG" | ||
| + | alt="OT-2 arm mount below"> | ||
| + | <img style="height: 600px; width: 420px" | ||
| + | src="https://static.igem.org/mediawiki/2019/c/c4/T--Marburg--mountside.JPG" | ||
| + | alt="OT-2 arm mount side"> | ||
| + | <figcaption style="text-align: center; max-width: 2000px"> | ||
| + | Fig.1 - 3D printed Raspberry Pi 4 Model B and ArduCAM mount for the OT-2 arm consisting of top and base parts. | ||
| + | </figcaption> | ||
| + | </figure> | ||
| + | |||
| + | <br> | ||
| + | <div style="display:flex;justify-content:center"> | ||
| + | <script src="https://embed.github.com/view/3d/igemsoftware2019/iGemMarburg2019/master/Hardware/Camera_mount_base.stl"></script> | ||
| + | <script src="https://embed.github.com/view/3d/igemsoftware2019/iGemMarburg2019/master/Hardware/Camera_mount_top.stl"></script> | ||
| + | </div> | ||
| + | |||
| + | |||
| + | |||
| + | </p> | ||
| + | |||
| + | </div> | ||
| + | |||
| + | </div> | ||
| + | </div> | ||
<figure style="text-align: center; margin-left: 25px;"> | <figure style="text-align: center; margin-left: 25px;"> | ||
<img style="height: 600px; width: 420px" | <img style="height: 600px; width: 420px" | ||
Revision as of 10:49, 7 December 2019
H A R D W A R E
Since last year’s iGEM team Marburg won the OT-2 in the Opentrons Robot Challenge, this year’s team built upon it and extended the amount of workflows, which could be performed with it.
A large number of OT-2 protocols have been developed, ranging from Golden Gate specific protocols over plasmid purification using Wizard® MagneSil® Plasmid Purification System to even colony picking.
However, this software would not be able to function without suitable hardware. To facilitate proper workflows in the OT-2, which is structured slotwise, new adapters, mounts and a variation of different tube holders had to be developed.
By designing and creating the required devices with a computer-aided design (CAD) software and a 3D printer, it was easy, cheap and fast to produce custom made labware, which would perfectly fit our needs.
As well as our developed software, all our software specific and additional created hardware designs are made open-source in our Github repository under the CERN Open Hardware Licence version 1.2 (CERN OHL v1.2), whereby it will benefit the whole iGEM community in order to simplify the work in the lab, with and even without the OT-2.
Our hardware consists of the following devices:
The Colony Picking Unit (CPU)
This hardware package contains STL files and instructions for everything that is needed to transform an OT-2 into a low-cost colony picker. This includes a STL file for the Raspberry Pi and ArduCAM mount, which will be fixed onto the OT-2 arm, a STL file for the light table, suitable for 90 mm petri dishes as well as for plates in SBS format, and a detailed instruction on how to solder and install the LEDs, Arduino and cables into the 3D printed light table.
Cultivation


The Plasmid Purification add-on
This add-on consists of an STL file describing the measurements of an adapter for the BioShake D30-T elm shaker from QInstruments to perfectly fit into slot 3 or slot 10 of the OT-2. The adapter combined with the file “CoordinatesOrdered.json” make the BioShake D30-T elm shaker accessible as labware in the OT-2 and are required to perform the plasmid purification with Promegas Wizard® MagneSil® Plasmid Purification System.

Additional Labware
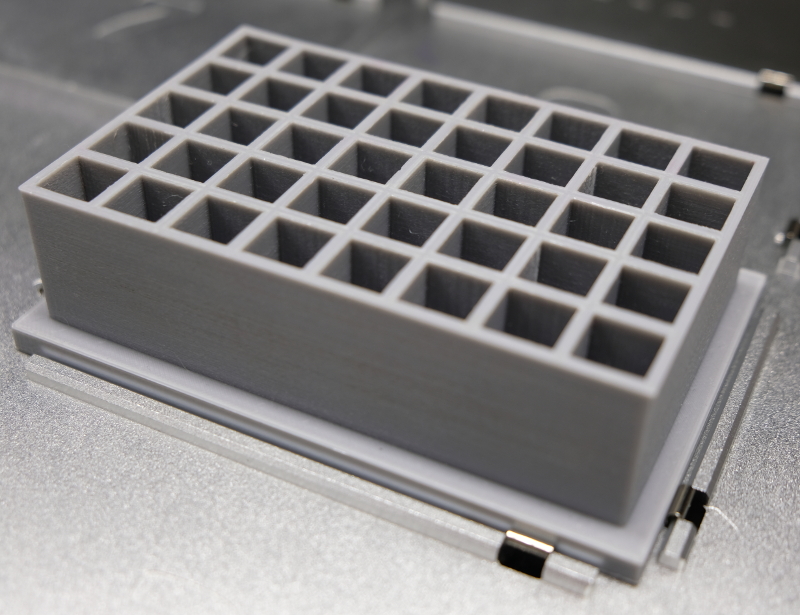
Cuvette holder
We created this labware suitable for 40 cuvettes and additionally fitting into an OT-2 slot to easily carry and fill cuvettes automatedly. Of course, this cuvette holder can also be used for manually filling cuvettes.
90 mm Petri dish SBS adapter
Automating the whole cloning process in the OT-2 includes not only colony picking, but also plating. That is why we designed an adapter for 90 mm petri dishes to fit into an OT-2 slot with SBS format. Protocols for plating with the OT-2 on agar plates in this adapter were developed and are freely available.

50 ml falcon tube holder
Every now and then a large amount of liquids is required and needs to be stored. 50 ml falcon tubes are often the right choice to do so. We designed a 50 ml falcon tube holder to carry 6 of 50 ml falcons. Additionally, this holder was designed in SBS format to also fit into the OT-2 for automated workflows.
